
This chapter describes the process of proper termination of a contract without services from a procedural point of view, as it is necessary to proceed in the correct order. This process involves three tasks or related steps:
-
Process No. 1 - this is the initiation of the process of proper termination of the contract, usually a few weeks before the expiration of the contract period. It includes changing the detailed status of the contract, usually from Active to Ending (or similar), generating an information sheet (letter 1).
-
Process No. 2 - mass invoicing of saleable prices, generating an invoice or an information sheet (letter 2). To be used only for financial leasing in the service delivery mode.
-
Process No. 3 - Final Step, Final Contract Review. Generating an infosheet or other documents, changing the detailed status of the contract to an archival one.
Navigation:
Process No. 1:
proper termination of the contract (change of detailed contract status)
For mass change of contract status from status Active for example, to the Ending (and the corresponding detailed state) is used in the system orderly termination of contracts.
you can find the task in the OneCore – Financing role center in the Actions section > Termination or by using the full-text search via the so-called MAGNIFYING glass, where you enter the name of the task.
When the task starts, the system displays a dialog box.
OPTIONS tab:
-
Closing Date From
-
The system automatically presets the date of the first day of the current month in which the task is run
-
An editable field can be changed when the task is started manually, the user can change the
-
WHEN you run a task from the scheduler, the field is blank
-
-
Closing Date To
-
The system automatically defaults to the date of the last day of the current month in which the task is run
-
An editable field can be changed when the task is started manually, the user can change the
-
WHEN running a task from the scheduler, the system fills in the date calculated as the system date + the number of days from the field No. of Days Before Proper Termination v OneCore Setup
-
FINANCING Contract Header Tab
It contains preset fields for filtering:
-
no. (No.)
-
customer No.
THE user can add additional fields to filter from all fields from the contract header.
After confirming OK , the system processes contracts where:
-
The detailed status is from the detailed contract status filter entered in the field Detailed Status Filter for Processing Duly Terminated Contracts in the table OneCore Setup
-
The expected end date is from the interval specified in the dialog box in the fields Closing Date From a Closing Date To
-
Difference Between Expected End Date and Job Start Date ≤ Number of days before proper termination in OneCore Settings
-
There are no change copies or it is not a variant of the contract
On the contracts filtered in this way, the system:
-
IN the event that in the OneCore Setup is the value of the field Check Posting All Payments = Yes, checks that all lines of the payment calendar (regular payments, accrual payments) are posted except for the line with the selling price
-
Checks that there is no unposted individual invoice for the contract.
On all contracts that meet the above conditions, the system:
-
Changes the detailed contract status to the detailed status set in the Detailed Status of a Contract Being Terminated v OneCore Setup – bookmark End and the corresponding contract status
-
THE result of the change is recorded in The Proper Termination Log (success and failure)
-
On contracts that met all conditions and the detailed contract status has been changed, the system will mark the Print Queue 1 = Yes (technical field, not visible to the user)
-
Populates the Print Queue of Contract Proper Termination – Batch 1 with contracts on which the status and detailed status of the contract have changed (flag Print Queue 1 = Yes and Printed = No)
-
When the task ends, the user is shown the Message Done.
Contract Proper Termination Log
JOB Result orderly termination of contracts is recorded in the table Proper Termination Log, where the system records successes (detailed contract status) and errors.
You can find the log in the OneCore – Financing role center in the Actions section > Termination or by using the full-text search via the so-called MAGNIFYING glass, where you enter the name of the task.
Field:
-
financing Contract No.
-
Adds Financing Contract No. to the system
-
Non-editable field
-
-
USER ID (User ID)
-
The system adds the ID of the User who started the task, resp. the ID under which the task is run from the
-
Scheduler Non-editable field
-
-
Change Date and Time
-
The system will fill in the date and time of the entry in the log
-
Non-editable field
-
-
RESULT
-
Completes the system from the options:
-
success
-
IF the change of the detailed status is without errors
-
-
Error
-
IF the change of the detailed status occurs with an error
-
-
-
Non-editable field
-
-
Error Detail:
-
Completes the system if RESULT = Error.
-
THE field shows the detail of the error that prevented the change of the detailed contract status. E.g. There are unposted lines on the contract (Payment), There is at least 1 unposted individual invoice, etc.)
-
Non-editable field
-
Contracts that ended in error will be left unchanged by the system. After the error is corrected by the user, the system will process the contract the next time the task is run orderly termination of contracts (when starting manually, the contract will be processed only if it matches the specified date filter, when starting from the task scheduler, it will be processed automatically).
Proper Termination Print Queue - Letter 1
When the job is complete orderly termination of contracts system of contracts on which the status and detailed status of the contract has been changed, the user will display the list of contracts in the overview Proper Termination Print Queue - Letter 1 (API Contract Print Buffer(end) (4026467, List) above the API Financing Contract Header (4026397) table, filters):
-
Calculation Variant=N
-
Prn. Queue 1=Y
-
Printed Queue 1=N
The print queue can be viewed from the hub role OneCore - Financing or OneCore - Financing (All products) over the tile Proper Termination Print Queue - Letter 1“
Printing letters:
-
It is possible to print documents from the queue individually for a contract or in bulk for selected contracts.
-
By selecting the contract and confirming the Print button in the ribbon, the user starts printing the documents that are defined in the Print Queue Setup table for the Letter 1 print phase.
-
For mass printing, the user selects the selected contracts and confirms the button Print. The system prints those documents that match the filters in the Print Queue Setup table with Print Phase (40) = Letter 1.
-
The system will generate the defined documents sequentially for each contract in PDF format under the name defined in Setting up a print queue in the File Name Mask to a ZIP file that the user can find in the downloaded documents.
-
After extracting the file and marking all the documents, it is possible to print the documents in bulk.
Note: To be able to print in bulk, you need to have Adobe Reader as the default application for reading PDF files.
When printing is complete, the system removes the contract(s) from the print queue (switches Prn. Queue 1=N and Printed Queue 1=Y).
To reprint documents, the user uses the standard function for printing documents from the financing contract (from the card or from the contract overview).
Process No.2:
sales Price Posting (for Financial Leasing)
Posting of sales price invoices occurs automatically in the system after the job is completed sales Price Posting.
you can find the task in the OneCore – Financing or OneCore – Financing (all products) section of The Actions section > Termination , or by using the full-text search via the so-called MAGNIFYING glass, where you enter the name of the task.
When the task starts, the system displays a dialog box.
OPTIONS tab:
-
Cosing Date From:
-
The system automatically presets the date of the first day of the current month in which the task was run
-
Editable field When running a task manually, the user can change the
-
WHEN running a task from the scheduler, the field is blank
-
-
Closing Date To
-
The system automatically presets the date of the last day of the current month on which the task was run
-
An editable field can be changed when the task is started manually, the user can change the
-
WHEN starting a task from the scheduler, the system fills in the start date of the task, i.e. the system date.
-
FINANCING Contract Header Tab
It contains a preset field for filtering contracts:
-
no. (No.)
-
customer No.
THE user can add additional fields to filter from all fields in the agreement header.
FINANCING Contract Line Tab
It contains a preset field for filtering contracts:
-
POSTING Date:
-
THE user enters the posting date of the sales price (the posting date from the contract payment calendar line, which is the selling price). A specific date or interval can be specified, e.g. 1.12.18..31.12.18
-
For the local currency, it is possible to charge sales prices in the future. In order to be able to post sales prices in a foreign currency, the exchange rate must be set in the system as of the settlement date, i.e. it cannot be posted in advance
-
-
IF the task is run from the scheduler, the system completes as follows
-
CURRENCY code on the contract
-
Blank (local currency) = job start day (system date)
-
-
Not empty = task start day – 1D
-
-
Required field for job execution
-
THE user can add additional fields to filter from all fields of financing contract lines (contract SPK).
After confirming OK , the system processes contracts where:
-
The detailed status is from the detailed contract status filter specified in the field Detailed Status of a Contract Being Terminated in the table OneCore Setup -bookmark End
-
The expected contract termination date is from the interval specified in the dialog box in the fields Closing Date From a Closing Date To
-
THERE is an unposted line with the selling price in the Payment T&C, and its posting date matches the filter specified in the dialog box POSTING Date
-
the sales price amount is lower than the amount in the field Sales Price Posting Limit in the table OneCore Setup – bookmark End.
On the contracts filtered in this way, it checks that:
-
ALL regular payments are posted (payments in the Contract GA) - they must be posted regardless of OneCore Setup.
When the job is complete, the system writes the result to the Sales Price Posting Log. successes and failures will be recorded in the log, i.e. if for some reason the sales price has not been posted, a log entry will be created for the contract with a description of the error.
On a contract that has met all the conditions and a sales price has been posted, the system changes the value of the field Print Queue 2 to Yes (checked)
SUBSEQUENTLY, on filtered contracts meeting the above parameters, the system:
-
Posts a line to the sales price and creates a document (sales invoice) where:
-
Document Date = Document Issue Date (working date)
-
POSTING Date = Posting Date from Financing Contract Line (Contract T&C)Due
-
Date = Due Date from Financing Contract Line (T&
-
C)VAT Date = VAT Date from Financing Contract Line (T&C)
-
-
Writes the Result of the task to Sales Price Posting Log
-
Populates The Print Queue Proper Termination – Letter 2 with the contracts on which the sales price invoice has been issued and posted (Print Queue 2 = Yes and Printed = No).
Sales Price Posting Log
JOB Result posting Sales Prices is recorded in a table Sales Price Posting Logwhere the system records both successes (the sales price invoice has been posted) and errors.
You can find the log on the role center OneCore – Financing in the Actions > Termination or using a full-text search via the so-called MAGNIFYING glass, where you enter the name of the task.
Field:
-
financing Contract No.
-
Adds Financing Contract No. To the system
-
Non-editable field
-
-
USER ID The
-
System adds the ID of the User who ran the task, resp. the ID under which the task was run from the scheduler
-
Non-editable field
-
-
Change Date and TimeAdds
-
The date and time of the entry to the log Non-editable
-
Field
-
-
RESULT
-
Completes the system from the options:
-
success
-
IF a sales price invoice has been created and posted
-
-
Error
-
IF the sales price invoice has not been posted
-
-
-
Non-editable field
-
-
Error Detail
-
It will complement the system in the event that RESULT = Error
-
THE field shows the detail of an error that prevented the creation and posting of a sales invoice, e.g. The detailed status does not allow posting of payments from the payment calendar, etc.
-
Non-editable field
-
Contracts that ended in error will be left unchanged by the system. After the error is corrected by the user, the system creates and posts a sales invoice for the sales price (if it complies with the specified Date and Posting Date filter) the next time the task is run.
Proper Termination Print Queue – Letter 2
When the job is complete posting Sales Prices system Contracts on which an invoice with a sales price has been posted, the user displays a list of contracts in the overview Proper Termination Print Queue - Letter 2 (API Prn.Buff.Proper.Term.Lett2 (4046934, List)) above the API Financing Contract Header (4026397) table, filters:
-
Calculation Variant=N
-
Prn. Queue 2=Y
-
Printed Queue 2=N
The print queue can be viewed from the hub role OneCore - Financing or OneCore - Financing (All products) over the tile Proper Termination Print Queue – Letter 2“.
Printing letters:
-
Documents can be printed individually per contract or collectively for selected contracts.
-
By marking the contracts and pressing the button Print in the ribbon, the user starts printing the documents that are defined in the table Setting up a print queue (Print Queue Setup) for the print phase Letter 2 (e.g. a cover letter or an invoice for the sales price can be added here).
-
For mass printing, the user selects the contracts and confirms the button Print. The system prints those documents that match the filters in the Print Queue Setup table with Print Phase (40) = Letter 2.
-
The system will generate the defined documents sequentially for each contract in PDF format under the name defined in the Setting up a print queue (Print Queue Setup) in the File Name Mask to a ZIP file that the user can find in the downloaded documents.
-
After extracting the file and marking all the documents, it is possible to print the documents in bulk.
Note: To be able to print in bulk, you need to have Adobe Reader as the default application for reading PDF files.
When printing is complete, the system removes the contract from the print queue (switches Prn. Queue 2=N and Printed Queue 2=Y).
To reprint documents, the user uses the standard function for printing documents from the financing contract (from the card or from the contract overview).
The sales price invoice can be reprinted from the list of posted sales invoices according to the document number specified on the sales price line in the TC contract, or by clicking on the invoice number in the GAC.
Process No. 3:
Checking Contracts Before Archiving
There is a task in the system for mass checking of properly terminated contracts before archiving Checking Contracts Before Archiving (Checking Contracts before Archiving).
you can find the task in the OneCore – Financing or OneCore – Financing (all products) roles in the Actions section > Termination , or by using a full-text search via the so-called MAGNIFYING glass, where you enter the name of the task.
When the task runs, the system displays a dialog box:
OPTIONS tab:
-
Extected Termination Date From:
-
The system automatically presets the date of the first day of the current month in which the task was run User
-
CAN change. If the user clears the date, the task can be run, the system will process contracts without the lower limit (similarly as when it is started from the scheduler)
-
IF the task is started from the task scheduler, this field will be empty, i.e. the system will process contracts without the lower limit for the expected end date
-
-
Expected Termination Date To:
-
The system automatically presets the current working date
-
THE user can change, he can enter any date. If nothing is entered, the system will process the editable field without restriction
-
.
-
-
Check Sales LineOff
-
By default Changes
-
THE user to Yes if he/she wants the system to check whether a posted and uncredited sales line is in the GAC (to Residual value or Sales fee), if such a line exists in the GAC.
-
It contains a preset field for filtering:
-
no. (No.)
-
customer No.
THE user can add additional fields to filter from all contract header fields.
After confirming THE OK,or after running the task in the task scheduler, the system goes through the contracts that:
-
Have an Expected End Date from the interval specified in the dialog box in the fields Closing Date From a Closing Date To
-
Detailed contract status = detailed status set in the field Detailed Status of a Contract Being Terminated v OneCore Setup – bookmark End (e.g. RUP)
-
There is no change copy or variant of the contract.
On the contracts filtered in this way, it checks that:
-
The contract has no issued and unposted individual invoices
-
If there was a flag in the dialog box Check Sales Line = Yes, the system checks whether the sales price has been posted and not credited (a line in the T&Cs of the Residual Value Contract or the Selling Fee), if such a line exists in the T&Cs
-
Contract Balance = 0.00
-
Contracts that meet the filter described above will be classified by the system in the Print Queues of Proper Termination – Letter 3.
Proper Termination Print Queue – Letter 3
When the job is complete Checking Contracts Before Archiving system Contracts that have fulfilled the conditions of the task, the user will display a list of contracts in the overview Proper Termination Print Queue – Letter 3.
The print queue can be viewed from the hub role OneCore – Financing or OneCore – Financing (all products) over the tile Proper Termination Print Queue – Letter 3 in overview Proper Termination Print Queue – Letter 3 API Prn.Buff.Proper.Term.Lett3 (4046935, List) above the API Financing Contract Header (4026397) table, filters:
-
Calculation Variant=N
-
Prn. Queue 3=Y
Printing letters:
Documents can be printed individually per contract or collectively for selected contracts.
By selecting the contracts and pressing the Print button in the ribbon, the user starts printing the documents that are defined in the table Print Queue Setup for the print phase Letter 3.
After confirming the function of the system:
-
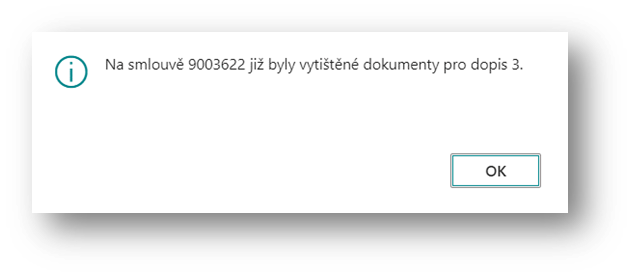
Checks to see if the documents for the contract have already been printed (flag Printed 3 on the financing contract). In the event that:
-
Yes
-
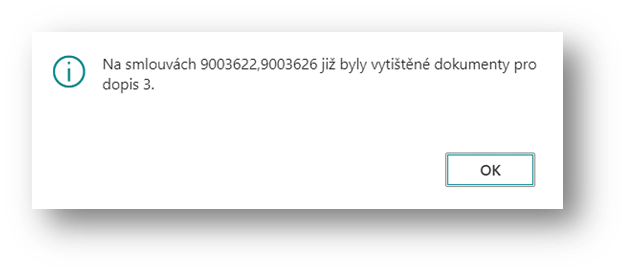
The system displays a message Documents for Letter 3 have already been printed on contract XY. THE user confirms OK and the system stops printing the contract. If mass printing from the queue is started, the system will continue to the next contract and after printing the last contract it will display the message: Documents for Letter 3 have already been printed on contracts XY, XX. THE user confirms OK to close the message.
-
(XY, XX... = contract number)
-
-
-
No
-
The system filters matching documents from the table Setting up a print queue to documents where the field PRINT Phase = Letter 3 and prints the selected documents
-
After all the documents have been printed, the system changes the value of the field on each contract:
-
Printed 3 = YES
-
-
Contracts will remain in the Proper Termination Press Queue – Letter 3
-
-
-
Cancel
-
The system stops printing documents without any changes.
-
For mass printing, the user selects the selected contracts and confirms the button Print. The system will generate the defined documents sequentially for each contract in PDF format under the name defined in the Setting up a print queue in the File Name Mask to a ZIP file that the user can find in the downloaded documents.
After extracting the file and marking all the documents, it is possible to print the documents in bulk.
Note: To be able to print in bulk, you need to have Adobe Reader as the default application for reading PDF files.
When printing is complete, the system does not discard the contracts from the print queue, but leaves them in the queue for archiving. To reprint documents, the user uses the standard function for printing documents from the financing contract (from the card or from the contract overview).
Archiving of the contract after proper termination
Archiving of the contract after proper termination can be done by the wizard to change the detailed status of the contract.
Deleting a Contract from the Print Queue
To remove a contract from the print queue without printing documents, you can use the Discard Contract From Print Queue, which is located in the Print Queue task bar of Contract Proper Termination – Letter 1/2/3.
EXAMPLE for Contract Print Queues Proper Termination – Letter 1:
After confirming the button, the system displays an informative message Are You sure you want to confirm printing and disable the contract from the queue? If the user chooses:
-
Yes
-
The system will remove the contract from the queue
-
-
Marks Printed 1/2/3 = YES
-
No
-
The system stops the function and does not dequeue the contracts.
-
IN the case of Print Queues Proper Termination - Letter 1 a Letter 2 it will not be possible to add a contract that has already been discarded in this way to the print queue again (the print queue is filled by the orderly Termination of Contract/Posting of Sales Prices).
To Print Queues Proper Termination – Letter 3 the contract will be re-listed if it meets the conditions of the job Checking Contracts Before Archiving. It will only be possible to archive the contract, it will no longer be possible to print, because by removing it from the print queue, printing from queue 3 has been confirmed (Printed 3 = Yes).